
Spring Flower Garland

The finished garlands in the background, aren't they beautiful?
I am way behind on my posts...I know!! Don't judge me! Finally got to writing this one which was for sure a favorite, and the process of making these was oh so delightful!
MATERIALS
Different Size Coffee Filters
Cupcake Liners
White Cardboard
Tempera in different Shades of Greens
Brushes

1) Set up the table as seen on the pic, with the liners, the filters, the oil pastels and the liquid watercolors (thinned with a little water) in jars with brushes and droppers.
2) Invite the children to paint as many as they can, because in Spring there's many many flowers. I suggested they started with the pastels first.
3) Using the droppers or brushes start covering every filter/liner. Liners do not absorb like the filters so they had to use the brushes with these which worked better at covering them.

Leave all of them on a flat and absorbent surface overnight to dry.
At our next class we worked on the leaves. We had done some diy stamps with cardboard and foam that we used but other children just chose to paint their own leaves.

4) Set up different jars of tempera paint in various shades of greens (this portion we did on the floor (previously covered with plastic tablecloth or canvas) and white 12x18 cardboards and brushes.
5) Have the kids paint the stamps and then press them hard on the paper. Or just tell them to paint their own leaves. They can get creative and make big, small, skinny, thick leaves.
6) Let them dry overnight and once dry get the children to cut them out.
7) Start assembling the flowers by putting a liner inside a coffee filter and there's different ways to do the flowers, you can just rol them together (kind of crumpling them tight) or make a cut through half of both (one of top of the other) and start rolling them at the same time (kind of like making a burrito). Then get your wire and start tying it on the bottom part of the flower you made and keep adding to the long wire more and more flowers.
8) Punch a hole in your leaves and tie a small piece of green yarn from it.
9) Lastly, once yo have all the strings of flowers hanging down, start adding the leaves by tying them to the wire in between the flowers.
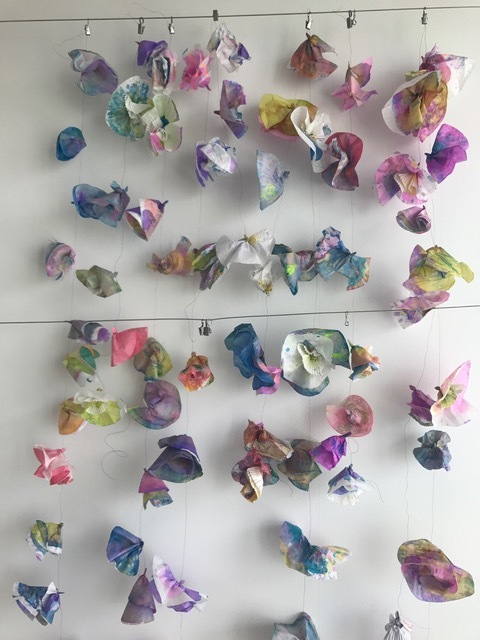
This is what the flowers look like once assembled into the wire (before adding the leaves)